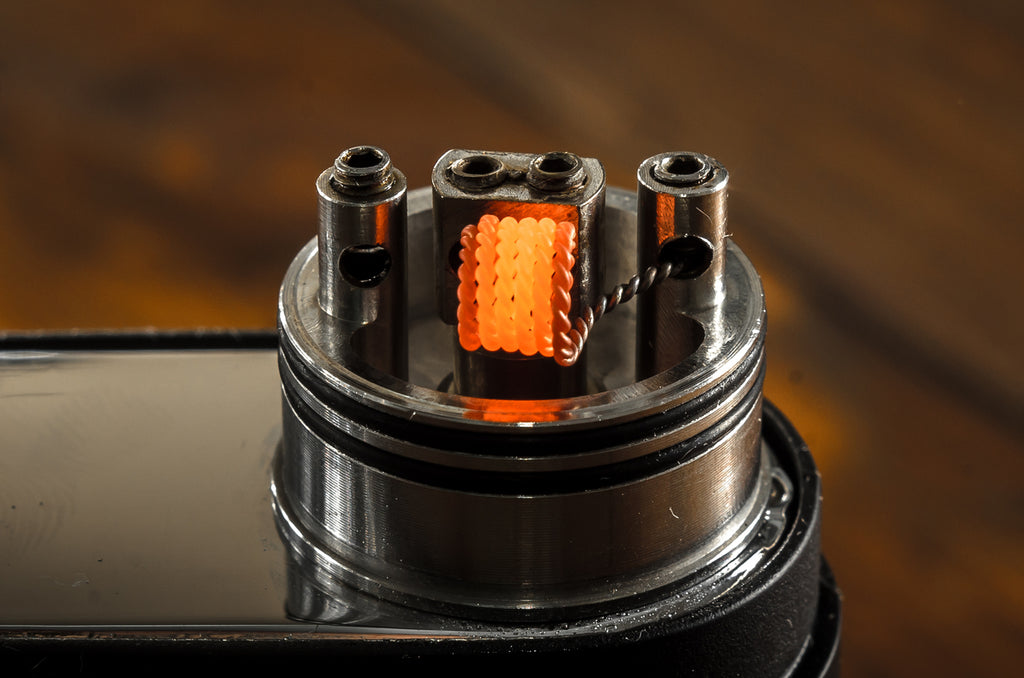
Vape coils are the single most replaced part of an e-liquid vaping rig. This two-in-one part that contains both the heating element and the wicks doesn't last forever. Most don't last more than one - three months before it has either stopped firing or become 'scorchy', at which point a coil must be thrown out and replaced with a new one. Sure, the vape brands sell them in packs but for an enthusiastic vaper, those replacement costs can become noticeable.
Fortunately, coils don't actually burn out as often as we think they do. In some cases, your heating coils may have simply gotten dirty. Dirty coils can happen or about half a dozen different reasons. When unbuilt pieces are let in the open, dust can build up on the coils which will stick and then burn the next time you install and heat them up. Old e-liquid in a mostly-empty tank can congeal on the coils over time. But sugary e-liquid is the most notorious culprit. Because the coil elements heat up the liquid directly, the sugar in the mixture caramelizes directly onto the coils which causes them to become gummy and eventually stop working.
So if your coil has failed or has become much weaker all too fast, try cleaning the coil before tossing it for a new one. Here's how to safely clean your vape coil one step at a time:
Supplies
-
1/2 Cup Ethanol, Vodka, or White Vinegar
The sticky stuff that builds up on a coil is usually not soluble in water, so you'll need something stronger to start with. Your top three options (pick any) are white vinegar, cheap vodka, or ethanol which is plain grain alcohol. Really, anything clear, potable (can drink it), and potent will do.
Never use isopropyl / rubbing alcohol. This can etch some of the materials used in the coil, tank, and pen construction.
-
1 Cup Distilled Water
Distilled water is what you get when steam from boiling water is recollected. The steam is pure H2O and is distilled water when it condenses again. You can buy distilled water or use these tricks to make some at home.
-
Running Tap Water
From the sink.
-
2 Hand Towels
For cleaning and drying.
Step 1: Wipe Down Each Piece
The first step is to remove any leftover e-liquid that is still clinging to your coil. Most of us do this without thinking as the little dribbles from the once-soaked piece get on our fingers. Use a paper towel or your first-hand towel to gently wipe down your coil, along with the other parts of your deconstructed tank. If you prefer, you can lightly damp the towel with water to help remove the oily e-liquid.
- For Rebuildable Coils
If you have a rebuildable coil with wicks that can be removed, do so now. Clean your wicks however you prefer so that they can reabsorb a new favorite flavor in the future. Then proceed with the rest of the steps for cleaning a non-rebuildable coil.
Step 2: Soak the Coils in Alcohol
Once your pieces are wiped down, drop your coil(s) into the half-cup of the clear solvent of your choice. Whether you chose to use ethanol, vodka, or vinegar doesn't matter, because the steps are the same. That said, most vapers wind up using bottom-shelf vodka because it is cheap, easy to find, and doesn't make your house smell like kimchee to leave out in the open for a few hours.
There has been some debate as to how long you want to soak your coils in the solvent. Some vapers swear by the overnight soak for revealing dissolved gunk you didn't even know was there. But two hours is a good rule of thumb if you're in a hurry.
Step 3: Rinse Coil in Tap Water
After you're done soaking, remove the coil from the solvent and rinse it out in your sink. For scientific purposes, try placing a tupperware under your rinse-water to see what comes out. You probably also have some signs of gunk swirling in the solvent as well. That's the stuff that just came off your coil.
- For Rebuildable Coils
While rinsing, or just before with the coil still in the solvent, try gently scrubbing the coils with a soft toothbrush. This usually isn't possible with replaceable coil designs.
Step 4: Rinse Coil in Distilled Water
Distilled water is free of all minerals and other tiny particles that are normally in our tap water. Rinsing once more time with a cup of distilled water isn't actually a necessary step, but it can help you ensure that even the tap water doesn't leave any residue behind on your coils. If you happen to have distilled water or feel like experimenting to make your own, it's a good step to take.
Step 5: Pat Down & Allow to Dry Overnight
Once you're fully done rinsing the coil, pat it dry with the second towel and blow gently through it so that the excess water is forced out through the wicking holes. Do not use a blow-dryer or any other artificial drying device. Instead, set the coil out on the clean towel and leave it overnight to dry. Now, the coils aren't your biggest slowdown but the cotton wicks, which will need to become completely dry via evaporation before the coil can be used again.
- For Rebuildable Coils
Because your wicks are cleaned separately, you may not need to wait the full overnight drying period.
Step 6: Test Dryness
Finally, before you try out your freshly cleaned coil for the first time, check it for dryness. Hold it in your hand, tap it, touch the wick if you can. If the coil is completely dry, then it is safe to put back into use.
Step 7: Vape Your Heart Out
This technique is a powerful method for bringing life back to gummy coils. You may find that with a thorough cleaning, your coils last up to twice as long with improved performance. For more great insights into vaping like a pro, contact us today!
